Saturday, January 30, 2021

MTN Launches TikTok Social Bundles

MTN Nigeria recently launched customized TikTok social bundles to cater for the growing number or TikTok users in the country. The new plans are available via *131*3*4# ranging from #50 (200MB daily) and #350 (2GB weekly). Customers who have installed the application are eligible to access this bundle.

MTN TikTok social bundles will allow customers to enjoy access to all their favorite contents including video uploading, downloading, and sharing, as well as chatting, etc.

TikTok Frequently Asked Questions

Q. Who is eligible for this offer?

A. All MTN customers who are having TikTok app installed on their phones are eligible to enjoy the TikTok Bundle.

Q. How do I access TikTok Bundle?

A. To access the bundle, simply dial *131*3*4# on your mobile phone and select your preferred plan.

Q. Can I subscribe to TikTok Bundle through SMS?

A. Yes, you can. Simply send the keyword of your preferred TikTok bundle plan to 131.

Q. Can I access all social apps with the MTN TikTok Bundle?

A. No, but you can access other social apps including TikTok App if you subscribe to All Social Bundle plans. Simply dial *131*3*6# and select your preferred plan OR send the keyword of your preferred All Social Bundle to 131.

Q. Can I access all contents on the TikTok app if I buy the TikTok bundle?

A. Yes, you would only be able to browse textual and pictorial contents, play videos, and download contents with the bundle.

Q. How much is the TikTok bundle?

A. The subscription charges are as follows.

TikTok Bundle Price:

  • Daily plan – N50
  • Weekly plan – N350

Q. Will my subscription be bundled with data allowance?

A. Yes but fair usage policy applies as follows.

TikTok Bundle Size:

  • Daily plan – 200MB
  • Weekly plan – 2GB

Q. How do I check my TikTok bundle balance?

A. To check your bundle balance, dial *131*4#.

Q. Will I be able to roll over my unused TikTok bundle data allowance?

A. Yes, you will be able to auto-renew the bundle when you have sufficient balance and your unused data will be rolled over.

YouTube’s New Clipping Feature Will Help You Cut And Share Parts Of Videos


YouTube has introduced a new tool called Clips which allows users to make short, shareable videos out of creators' live streams. Clipping is a standard feature in live streaming and it's finally being adopted by YouTube.

You can then click on that tool and choose a 5-second to 60-second segment from their videos and streams. You can adjust the length of the clip within the set limits by dragging the slider. After creating a clip, you can add a title and share it across various platforms via a new URL, embed code, text, or email.

Ryan Wyatt, head of gaming and commerce on YouTube, noted that clipping is a highly requested tool. YouTube also vowed to release updates to Clips based on feedback from early adopters.

It's, perhaps, worth noting that the resulting clip doesn't lead to a new video, but can only be played on the original video in a repeating loop. This means that the clip will be deleted when the original content is removed.

YouTube Clips feature isn't ready for a wide release yet. An experimental clipping tool will be visible on channels where the test is live.

Here's everything we know about YouTube Clips at this point.

Clips on YouTube: Currently in Testing

YouTube is testing Clips with a small group of creators while gathering feedback to guide further development of this feature.

Clips can be created during a creator's live stream and from the video on demand (VOD) uploaded afterward.

If you're viewing content from one of the channels included in the test group, you'll see a clip icon under the video which looks like a pair of scissors.

Tap the clip icon and you can select a portion of the video to share with others.

Add a title and click "Share Clip" and YouTube will generate a URL for you to share.

The clip will be played on the original video and loop repeatedly.

Both creators and signed in viewers can create Clips. Clips can be shared on social channels or via direct communications (for example, email or text).

While clips can only be made from certain channels during the test period, all viewers can create clips from those channels.

When a user creates a clip it's stored in a dedicated tab which will house all the clips the user creates across YouTube.

YouTube doesn't specify which channels are part of the test group so you will have to look for the icon.

For more information, and a complete video demonstration of Clips in action, see the video below:

Thursday, January 28, 2021

Blogger to WordPress: A Beginner’s Guide to Migrating Your Site Without Losing SEO

Are you planning to transfer your site from Blogger to WordPress but don’t want to lose traffic and search engine rankings? Keep reading, because, in this article, we’ll explain why migrating your site can be beneficial and provide a step-by-step guide to help you complete the transfer process easily.

Why Would You Migrate from Blogger to WordPress?

Blogger is a reliable but simple blogging platform for creating and publishing blog posts. But when it comes to expanding your site towards a larger-scale project (such as a digital store), Blogger may not provide all the features you need.
On the other hand, WordPress is a fully-featured CMS that you can rely on to create any kind of website, from a personal blog to a business site. Let’s cover some of its strongest features:
  • Self-hosted — you can choose where to host your site, which allows for greater control on how much you spend, and what you get for it.
  • Plugin and theme availability — tons of plugins and themes are available to shape your website into whatever you need it to be, and to extend its functionality.
  • Completely customizable — you can easily change how your website looks and tailor it perfectly to your audience.
  • SEO friendly — The WordPress plugin and theme libraries offer plenty of SEO friendly options to improve how your site ranks.
  • Light — WordPress doesn’t require a lot of memory, loads fast, and offers a great user experience for both visitors and webmasters.
Keep in mind that when we talk about WordPress, we talk about the CMS that can be found on WordPress.org, not the platform WordPress.com. The two platforms have many key differences when it comes to hosting, domains, monetization, etc.

3 Easy Steps to Migrate from Blogger to WordPress

Now that you know the benefits, let’s start migrating your site from Blogger to WordPress:

Step 1. Get Web Hosting

First and foremost, find the best web hosting provider for your WordPress site.
You can check out Hostinger’s WordPress hosting plans, which provide a one-click WordPress installer, a 99.9% uptime guarantee, 24/7 customer support, and special optimization to improve WordPress performance.Hostinger WordPress Hosting PageHere’s how you get Hostinger’s WordPress hosting:
  1. Navigate to the WordPress hosting page.
  2. Pick your preferred plan and click Add to cart.
  3. At the Shopping Cart, you can add other services like daily backups. Then, click Checkout Now.
  4. Complete the Sign Up process to create a new Hostinger account or Log In if you have one.
  5. Pick the payment method and complete the purchase.
If you opt for the Premium or Business plan for 12 months or longer, you can register a premium domain completely free for the first year. Alternatively, if you already have a domain, you can transfer it to Hostinger.
Now we can use the hPanel to install WordPress:
  1. Head to the Hosting menu on the hPanel, select Manage.
  2. Navigate to the Websites section, and choose the Auto Installer.
  3. Select WordPress and fill out all required information, including your domain name, then click Install.

Step 2. Manually Transfer Your Site Data

Next, transfer your site’s content from Blogger to WordPress manually:
  1. From the Blogger Dashboard go to Settings -> Other.
  2. In the Import & back up section, select Back up Content -> Save to your computer. The XML file will be downloaded automatically to your device.Import and Back up Section on Blogger Dashboard
  3. Now, head to the WordPress Dashboard, there go to Tools -> Import.
  4. Choose Blogger by clicking Install Now, then select Run Importer.
  5. On the Import Blogger page, press the Choose File button.
  6. Locate the XML file you’ve saved and Upload it.
  7. You will be redirected to the Assign Authors page. Fill out the user information and click Submit.Assign Author Page on WordPress
Congratulations. You have your Blogger website’s posts, comments, and categories in your new WordPress site. But it’s not over yet, the last step is redirecting your traffic.

Step 3. Redirect Your Traffic with a Plugin

The most important part of preserving SEO is having your old site redirect to the new one. In this tutorial, we’ll use a WordPress plugin ‒ Blogger To WordPress Redirection.
First, set up your WordPress permalinks to resemble Blogger’s link structure.
  1. Head to WordPress Dashboard -> Settings -> Permalinks.
  2. In the Common Settings section, choose Month & name.
  3. Hit Save Changes.
Now, let’s start the redirection setup:
  1. Download and activate the Blogger To WordPress Redirectionplugin from the WordPress dashboard’s plugin section.
  2. Navigate to Tools -> Blogger To WordPress Redirection.
  3. Click the Start Configuration button to display the List of Blogssection. Then press Get Code. Copy the generated code.Blogger To WordPress Redirection Generated Code
  4. Now, head to your Blogger Dashboard -> Theme.
  5. Scroll down to the bottom of the page and click Revert to classic themes. Before inserting the code, it’s recommended to backup your old Blogger theme in case anything goes wrong.
  6. In the Edit Theme HTML box, replace the whole code with the generated one -> Save theme.Edit Theme HTML Box on Blogger
  7. If you want to test whether the redirection is successful, head back to the Blogger To WordPress Redirection page and select Verify Configuration. Click the Blogger link in the Test Casesection.
Additionally, if your Blogger site has RSS subscribers, you also need to redirect the feed.
  1. Access your Blogger Dashboard -> Settings -> Other.
  2. In the Site Feed section, click Add next to Post Feed Redirect URL.
  3. Type your WordPress feed URL (Eg.: http://yoursitename.com/feed).

Conclusion

As Blogger provides basic features for building a simple blog, migrating from Blogger to WordPress is necessary to get more and better features for growing your site. When transferring, it’s important not to overlook a few key steps that will help carry over traffic and SEO metrics.
Here is the recap of how to carry your site over from Blogger to WordPress without affecting SEO:
  1. Find WordPress hosting that will meet your needs, then install the CMS.
  2. Transfer your site’s content manually by downloading the XML file from Blogger, then upload it to WordPress.
  3. Activate the Blogger To WordPress Redirection plugin to automatically redirect visitors and search engines to your new site.
There you go. Give it a try and good luck.

How To Backup Drivers in Windows 10 and Restore Them

How To Backup Drivers in Windows 10 and Restore Them

Frequent driver updates on your Windows PC are rolled out to fix all kinds of bugs, introduce new features and improve overall performance and stability. But there could be instances when a driver update might not be compatible with your newly installed driver and you might have to restore your driver to the previous version. One way to do that is the Roll Back Driver Option.
If you are facing issues while updating drivers here’s what you can do.
Let’s say you have recently updated your graphics driver or your sound adapter and are facing driver issues. Before heading on to the Roll Back Driver option make sure you have a backup of drivers ready.
You can backup Drivers in Windows 10 using one of the methods mentioned below.
1. You can backup drivers in Windows 10 using software
2. You can manually backup drivers in Windows 10 by using the elevated command prompt

1. Backup Drivers in Windows 10 Using Driver Update Software

Before you use the “Roll Back Driver” option, make sure that you take a backup of drivers already present on your system. This will ensure that you at least have your old drivers safe in case you don’t have any other ways of recovering your old drivers.
 There are several backup and driver update software available in the market that don’t just let you take a backup of your existing drivers but even let you update all drivers in windows 10 as well. Not just that, these even let you restore drivers should an emergency arise.
Advanced Driver Updater is one such fantastic driver update software that apart from scanning your Windows PC for outdated drivers and updating them, also gives you the facility of creating a backup of your drivers as well.
Advanced Driver Updater Software
It exhibits the following features like –
  • You can choose to backup all the drivers or backup selective drivers on your Windows PC and then you can restore driver as and when required.
  • You can exclude those drivers from the scan list that cause frequent compatibility issues or cause system instability
  • Schedule the scan of drivers as per your wish. This will ensure that as soon as new hardware is released, you have a driver ready for that device.
download
This is How Advanced Driver Updater Works to backup drivers windows 10 –  
1. Launch Advanced Driver Updater
2. Once you have launched Advanced Driver Updater, click on Restore option. Here you can choose the desired driver from the list that you wish to restore.
3. When you are sure of the driver, click on ‘Load backup’ to restore the desired driver backup and a previous version of a driver.

2. Using Elevated Command Prompt to Backup Drivers in Windows 10

Also known as an ‘Elevated Command-line’ or ‘Elevated Mode’, this mode allows the user to execute system commands using administrative privileges. These are the privileges that a normal user does not get.
To open the Elevated Command Prompt –
1. Search for Command Prompt and choose Run as administrator
Elevated Command Prompt to Backup Drivers
2. Enter the following command in the prompt that opens
dism /online /export-driver /destination:”the folder path” .
Replace the folder path’ with the path where you wish to export the driver backup. Eg: dism /online /export-driver /destination: “D:\Drivers Backup”
3. You can now close the command prompt and head towards the specified folder (D:\Drivers Backup) where you will find the driver backup is created.

Restore drivers in Windows 10 Using the Roll Back Driver Option

Now to restore Backup Drivers in Windows 10 using the Roll Back Driver option you must meet two basic requirements which are mentioned below –
  • To restore driver of hardware, you must make sure that the device whose driver you wish to restore has a previous version of the driver installed, something where driver backup can come in handy.
  • You must be logged in as an Administrator
Note: If either of the two points is not met when using Roll Back Driver, you will find that the Roll Back Driver is disabled or is dimmed.
Ways you can reach the Roll Back Driver option to restore drivers –
1. Reaching Roll Back Driver Option Using the Start Menu
2. Reaching Roll Back Driver Option Using Run Command

1. Reaching Roll Back Driver Option Using the Start MenuUsing Start Menu for Roll Back Driver Option

  1. Type Device Manager in the search bar appears next to the Window Button.
  2. When the Device Manager window opens, click on any Device’s tree view (> Device)
  3. Right-click on the Device and click on Properties
  4. In the Device Manager window that opens click on the Driver tab
  5. Click on the Roll Back Driver option

2. Reaching Roll Back Driver Option Using Run Command

Roll Back Driver Option Using Run Command                                                                              

  1. Press Win+R button
  2. Type devmgmt.msc in the search bar
  3. Press OK
  4. When the Device Manager window opens, click on any Device’s tree view (> Device)
  5. Right-click on the Device and click on Properties
  6. In the Device Manager window that opens click on the Driver tab
  7. Click on the Roll Back Driver option

Restore Drivers Using Backup  That You Have Stored At A Specified Location

Browse my computer for driver software
We have already mentioned how you can backup drivers in a specified folder. Once you have the backup ready in the specified folder (D:\ in our case), follow the steps mentioned below to restore drivers
  1. Search for device manager in the search bar next to the window button
  2. Select the device whose driver you wish to update and go to Properties
  3. Head to the drivers tab and click on the Update Driver
  4. Now click on Browse my computer for driver software
More commonly known as a driver, a device driver or hardware driver is a group of files that enable one or more hardware devices to communicate with the computer’s operating system. Without drivers, the computer would not be able to send and receive data correctly to hardware devices, such as a printer.

To Wrap Up

Drivers or device drivers as they are more commonly referred to, are very important as they enable hardware devices to communicate with your PC’s operating system. If you are facing issues in creating a backup of drivers, these are some of the ways using which you can backup and restore drivers.

Tuesday, January 26, 2021

Top 10 Most Downloaded Movies of The Week

I have compiled the list of the top 10 most downloaded movies of the week. It will give you a clue into the next movie to see.

For this week list, 'News Of The World' tops the chart, followed by 'Wonder Woman 1984′. 'Soul' completes the top three. This week we have three new entries in the list. The Western drama movie "News of the World," starring Tom Hanks, is the most downloaded title this week.


List of Top 10 Most Downloaded Movies of The Week

  1. News of the World
  2. Wonder Woman 1984
  3. Soul
  4. Outside The Wire
  5. Synchronic
  6. Tenet
  7. The Croods: A New Age
  8. Promising Young Woman
  9. Shadow in the Cloud
  10. Greenland
The data for our weekly download chart is estimated by TorrentFreak and is for informational and educational reference only. All the movies on the list are Web DL/Webrip/HDRip/BDrip/DVDrip unless stated otherwise.

These torrent download statistics are meant to provide further insight into the piracy trends. All data are gathered from public resources.

For some of the movies you are yet to see in the list above, you can download it from the Netflix Premium Mod app or you should check our previously listed movies on this site to download from.

Labels:

Federal Government Says Don’t Block Any Nigerians SIM Cards Without NIN

President Muhammadu Buhari ordered yesterday that no subscriber should be blocked from telecom operators' networks till February 9, 2021.

Subscribers, who hadn't link their NIN to sim cards, would have had their lines blocked on January 19, being the initial deadline for them to link their SIMs to their National Identity Number, NIN.


NIMC took to their social media handle to advise legal Nigerians to register for their NIN and link it with their sim cards before February 19th.

Earlier in Dec 2020, the Federal Government declared that after December 30, 2020, all SIMs that were not registered with valid NINs on the network of telecommunications companies would be blocked. It later extended the deadline following widespread opposition against the earlier announcement and gave three weeks' extension for subscribers with NIN from December 30, 2020, to January 19, 2021.

It also gave six weeks' extension for subscribers without NIN from December 30, 2020, to February 9, 2021. However, before the January deadline, many telephone users and organizations called for a further deadline extension or outright suspension of the NIN registration process due to the large number of people that are yet to get their NINs.

At the expiration of the January 19 deadline, Nigerians went into panic mode, following the consistent statements by the Minister of Communications and Digital Economy, Dr. Ibrahim Pantami that those who didn't meet the deadline will be blocked.

Some Nigerians still believe that the new deadline been February 9 may still be extended considering the fact that a large proportion of the populace are yet to enroll for NIMC, not because they don't want to but because the crowd in each allocated centers are unbearable.

You can use this link in the article here to link your NIN to your various sim cards. Let us know in the comment if you have gotten your NIN.

Glo Introduces Cashtokens, Here is Everything You Need to Know

Globacom is here again with another season of cash tokens for all her subscribers. As a subscribers, you will win different cash prizes ranging from N5,000 to N100 million in the next three months.


This is courtesy of another season of the company's recharge-based loyalty programme, Glo Reward Cashtoken, which began on December 18, 2020, and will run up to March 31, 2021.

According to Glo, that the need to allow other subscribers, particularly those who did not win prizes during the first season to have another chance to win. Cashtoken will be earned by subscribers, just like in the first season, each time they recharge their lines, with each Cashtoken giving an assured cashback.

How to be Part of Glo Cashtoken

To enroll for Glo Rewards, dial *777*6# and start recharging to earn Cashtokens.

However, for new customers who are just joining Glo network, Cashtoken awaits them on first recharge of N200 only, after which they will earn more Cashtokens on every cumulative recharge of N1000 during a calendar month.

The company explained, adding that existing customers will earn Cashtokens on every N1000 cumulative recharge within a calendar month.

Finally, subscribers who continued to meet the eligibility criteria will earn and accumulate Cashtokens without break. Globacom added that there is no upper limit to accumulating Cashtokens and those tokens will be warehoused in a virtual wallet that is linked to the subscriber's mobile number.

OPPO A93 5G with 90Hz Display, 5000mAh Battery

Oppo has unveiled its latest device, A93 5G the company's latest mid-range 5G smartphone in China. It comes with cool specification and good battery life.

Oppo A93 5G features a 6.5-inch FHD+ LCD 90Hz display with 180Hz touch sampling rate, 90.5% screen-to-body, and it is powered by the latest Snapdragon 480 SoC. It also comes with, 8GB of RAM and runs Android 11 with ColorOS 11.1 out of the box.


Looking at the cameras, we have a 8-megapixel punch-hole camera in front, triple rear cameras that includes a 48-megapixel main camera, 2-megapixel macro and a 2-megapixel portrait sensor.

Of cause it is a 5G mobile device housed by a battery capacity of 5000mAh with 18W charging.

Other features includes; a side-mounted fingerprint scanner that can unlock the phone in 0.28 seconds, Bluetooth 5.1, GPS/ GLONASS/ Beidou, USB Type-C.

Highlight Specifications of OPPO A93 5G

Display: 6.5-inch (2400×1080 pixels) FHD+ 90Hz LTPS LCD screen, 480 nits brightness

Chipset: Octa Core Snapdragon 480 8nm Mobile Platform (2GHz x 2+1.8GHz x 6 Kryo 540 CPUs) with Adreno 619 GPU

RAM + ROM: 8GB RAM, 128GB / 256GB (UFS 2.1) storage, expandable memory up to 256GB with microSD

SIM: Dual SIM

Operating System: ColorOS 11.1 based on Android 11

Cameras: 48MP rear camera with f/1.7 aperture, PDAF, LED flash, 2MP depth and 2MP macro cameras with f/2.4 aperture

Front Camera: 8MP front-facing camera with f/2.0 aperture

Sensor: Side-mounted fingerprint sensor

3.5mm audio jack

Dimensions: 162.9×74.7×8.4mm; Weight: 188g

Network: 5G SA/NSA, Dual 4G VoLTE, Wi-Fi 802.11 ax (2.4GHz + 5.1GHz + 5.8GHz), Bluetooth 5.1, GPS/ GLONASS/ Beidou, USB Type-C

Battery: 5000mAh battery with 18W charging

Pricing

It will be priced at US$ 309 for the 8GB RAM with 256GB.

Sunday, January 17, 2021

How to Start a Successful T-shirt Printing Business

Starting a t-shirt printing business is exciting and can be rewarding; it offers a chance to be creative and to create products that people will wear out in public. However, like any business, starting a t-shirt printing business is challenging.

How to Start a Successful T-shirt Printing Business

Starting a t-shirt printing business is exciting and can be rewarding; it offers a chance to be creative and to create products that people will wear out in public. However, like any business, starting a t-shirt printing business is challenging.

It can be tough attempting to compete with the many other online options people now have at their fingertips.

In this article, we look at the ins and outs of starting a t-shirt printing business and how to give yourself the best chance of making it a success.

How Much Does it Cost?

The good news about starting a t-shirt printing business today is that it's much cheaper and more accessible than it was in the past. Technology is more affordable now than it was 20 or so years ago. You don't have to have a retail store to sell your products or services anymore.

Another factor to consider for starting up a t-shirt printing business is that you don't have to buy much equipment to start. If you don't want to invest in printing presses or fabric printers, you can design the shirts and outsource the printing to one of the many online printers. Outsourcing keeps your initial expenses low.

The minimum

If you're going the outsourcing route, the investment is minimal:

  • Computer – $500 – $1,000
  • Design Software or outsource designs – $1,000

Total investment = $1,500 – $2,000

You can get the shirts printed as the orders come in.

Go Big or Go Home

Now, if you're thinking of investing in a printing machine, you're looking at more significant upfront costs.

  • A decent direct-to-garment (DTG) or die sublimation printers cost $10,000 – $20,000
  • Ink can range upwards of $5,000 or more.

Total investment = $15,000 – $25,000

Keep in mind that while these are significant start-up expenses, you will be making money to help pay off this equipment as you ramp up your business. Investing in your equipment is essential when you are ready to turn your hobby into a business. These kinds of printers will help you scale.

How Much Money Can You Make?

It's tough to say how much money you can make printing t-shirts. It depends mainly on the market, the niche you're in, and how quickly you can grow your business. The average price for a one-color print on a shirt is about $9. The price goes up as you add more colors to the print or choose a higher quality shirt.

So, depending on your market, you can expect to charge your customer anywhere from $15 to $20 per shirt. You can also cost more for custom designs or illustrations if you have that ability.

As a very general idea, a typical t-shirt printing company could make $90,000+ a year.

Advice For Getting Started

Conduct Market Research

Like any business venture, you must research your market to find out what the need is. See what your competitors are doing so you don't end up offering the same services or cater to the same customers. Reading online reviews for your competitors will help you see what the market likes and dislikes.

For example, if you see many online complaints mentioning high shipping costs, offer cheaper or free shipping if your margins allow.

During this market research phase, it's wise to look for a niche you can fill. Specializing in something and offering something unique is a better way to hook customers. For example, you may carve out a niche serving non-profit companies who want shirts for programs they offer or for fundraisers.

Alternatively, maybe you want to target new parents with infant wear.

Test Your Product & Print Service

Whether you're printing the shirts yourself or going with a service, always test the quality to make sure everything fit to sell before you distribute to customers. The last thing you want is for an order to arrive and have the customer be unhappy with the quality.

Unhappy customers could lead to lost revenue and a bad reputation for your new business.

Start Small

If you're getting a printer to print shirts yourself, don't sell the house to get a ten-color automatic press. Get a decent four-color press, your basic inks, and screens and start small. Add more only when the business is there to pay for it.

Invest in the Best Equipment & Supplies

Now, let's say you want to start small by using a desktop printer. There are many digital printers available such as the Epson F2100 or the Brother GTX. The advantage of using these digital printers is that they allow you to do stunning prints on fabrics without the high cost of traditional screen printing presses.

Just remember that these printers are best for smaller quantity jobs. Also, using these digital printers are great for the environment because they use less electricity and reduce water usage that comes with operating a traditional press.

Lastly, you'll have to purchase t-shirts as well as ink, and don't forget the shipping supplies. The t-shirt you choose depends largely on preference. Higher quality t-shirts — while they cost more — hold up better over time and are preferred by customers over thin, cheap shirts, so keep that in mind when planning your business.

There are many types of ink to consider when printing on fabric, such as acid inks and reactive inks. Reactive inks offer great color and durability when standing up to repeated washing. Acid inks are also very vibrant and ideal for printing on shirt colors that don't traditionally hold color well, such as wool and silk.

Do your research when buying inks and see what type best suits the bulk of the printing you'll be doing.

Figure Out What Works Before Branching Out

While you may have a bunch of different ideas bouncing around in your mind about what products you'd like to sell after t-shirts, make sure to become an expert in that before branching out. Use your time and efforts to get your t-shirt businesses up and running, then use that revenue to start adding more items to your shop!

Market Your Company

Once you've determined your niche, it's time to market your service and network with people and companies who can help you out. Social media and meetup groups are the right places to start. You can also get started by offering shirts to local companies, ball teams, or for fundraisers to get the word out about your company.

Go to your local schools and offer to print their jerseys or fan merchandise. Also, target organizations and businesses that sell products in whatever niche you've chosen to go in.

Once you've done the grassroots options and feel like you're hitting a wall, it may be time to look into paid ads. Implementing ads on social media might be the next best place to start. The online marketplace is booming, and with online advertisements, you can choose to target your exact audience.

Targeted paid ads will help you save money because you aren't throwing money into avenues and audiences that won't be receptive to your product.

Best paid ad platforms: 

  • Facebook
  • Instagram
  • Google

Facebook and Instagram are the best for the T-Shirt industry. Especially if you know your target audience.

Create Your Designs

So now you've figured out your niche and developed your business plan, it's time to start designing your shirts.

Outsource

The first thing you want to think about is if it makes more sense to outsource your designs to make them yourself or in-house. Freelance graphic designers can charge $75+/hour. If you don't have the experience or time to create designs, hiring someone may be your best best.

Create Your Own

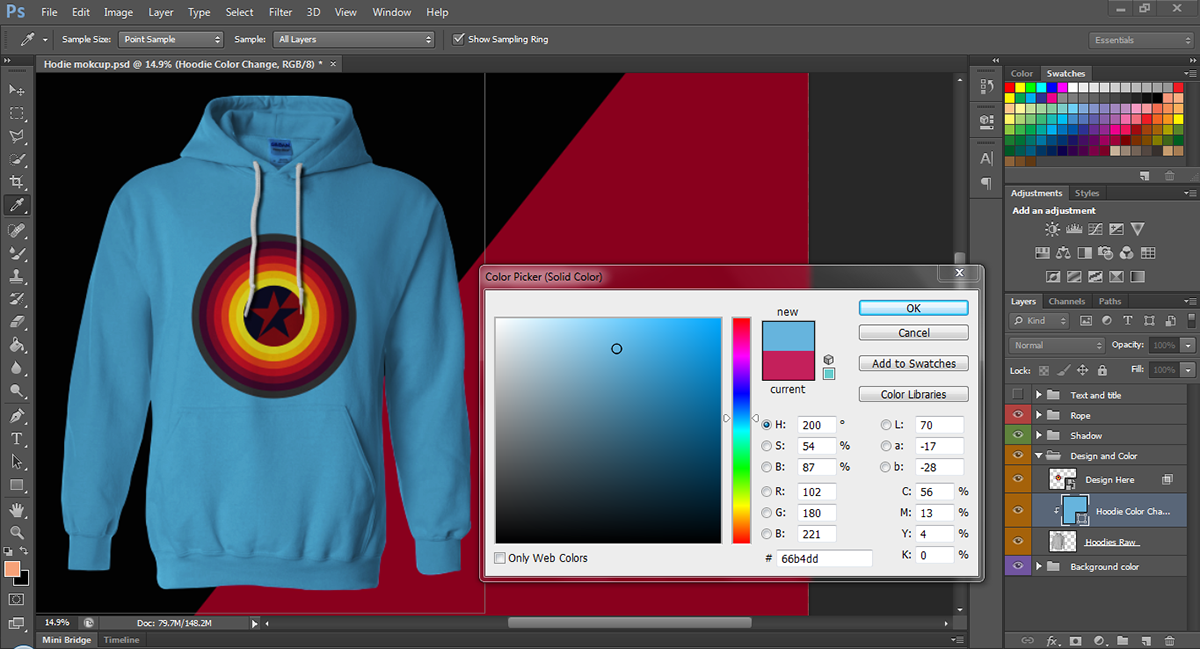
If you choose to create your designs, you'll need a computer. Whether you go Mac or Windows doesn't matter; use what is most comfortable.

Once you have a computer, you need some software. Adobe Illustrator and Adobe Photoshop are indispensable and 'must-haves' for your designs. If you're not into Adobe's products, any vector-based software such as CorelDraw or Inkscape will do. Of course, there are many specialized programs developed just for the screen print industry such as InkSoft. Of course, you're going to need a website to showcase your work and as a place where people can contact you too. Also, plan on getting some invoicing software to take care of your billing and accounts as well.

Closing Thoughts

These tips are just the basics, and you'll learn more as your business grows. Remember to focus on doing quality work and making sure every customer is satisfied to generate positive reviews and word of mouth. Prep yourself on social media and get out in the community and make yourself known.

Labels:

Saturday, January 16, 2021

Men's Hoodie Mockup Free Download​​​​​​​

Customize color inside of the Hoodie

Labels: