How to take a screenshot on your Mac
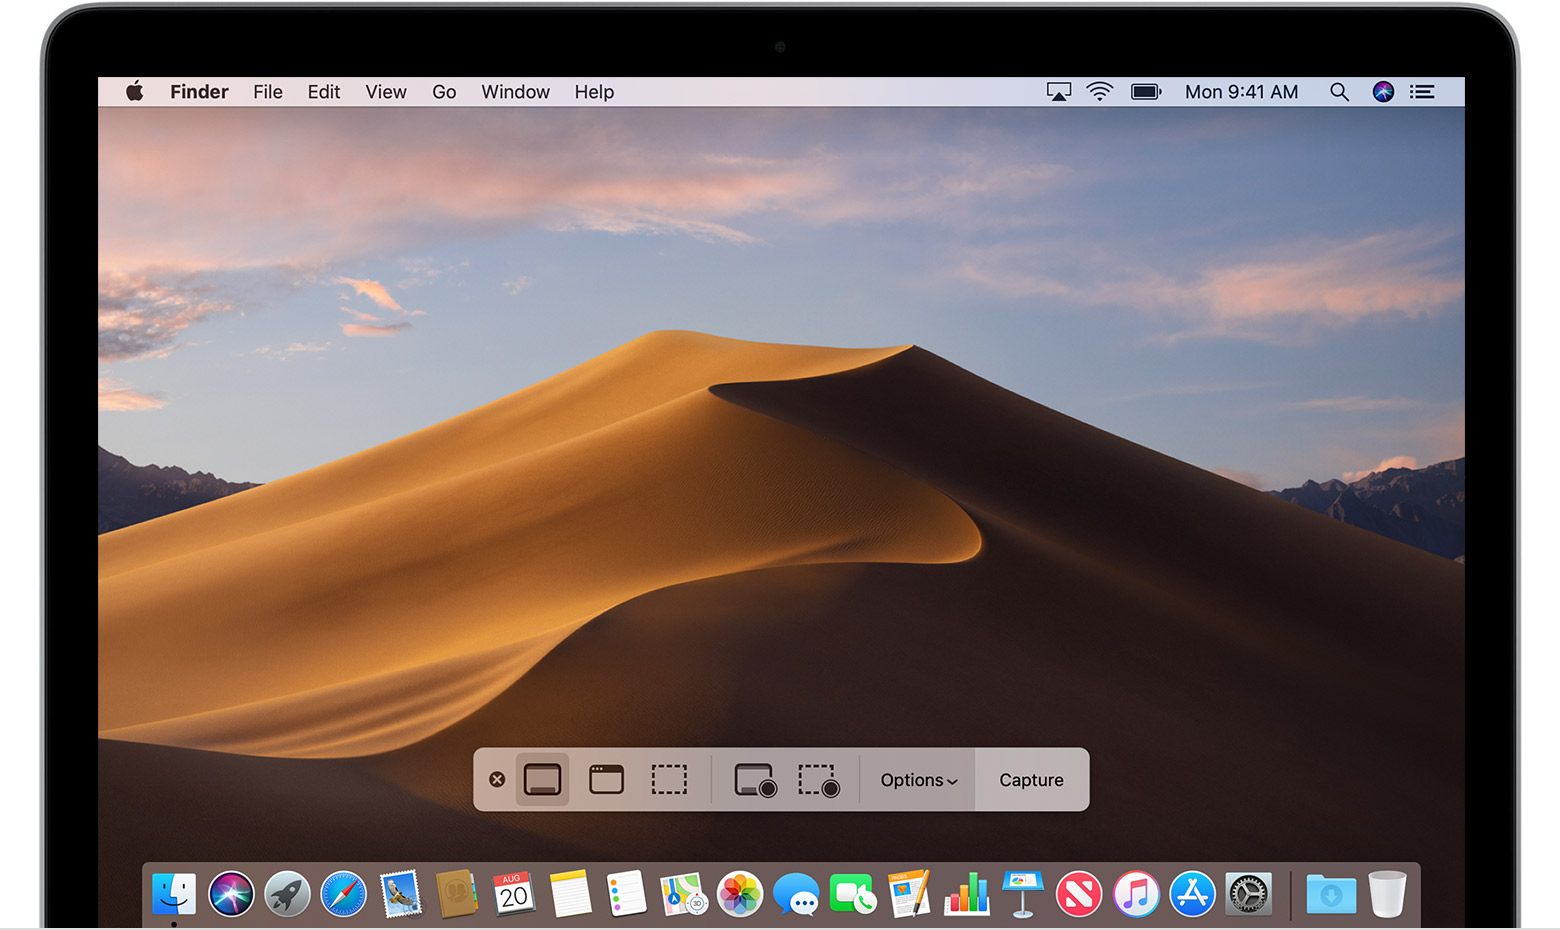
Use Shift-Command-5 in macOS Mojave

Capture the entire screen
- Click
 in the onscreen controls. Your pointer changes to a camera
  .
. - Click any screen to capture that screen, or click Capture in the onscreen controls.
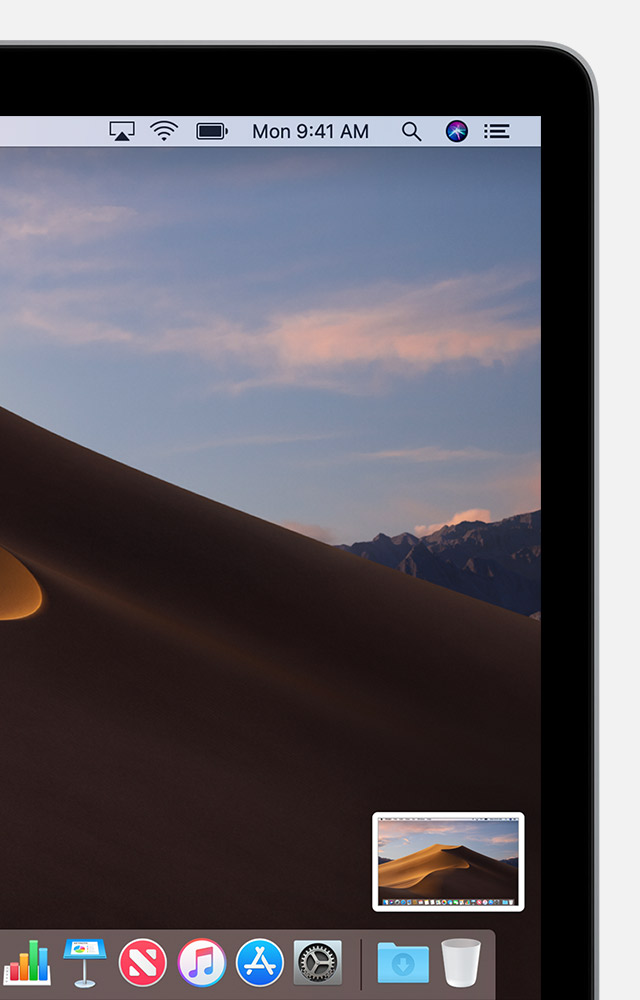
- Use the thumbnail to markup, share, save, or take other actions.
Capture a window
- Click
 in the onscreen controls. Your pointer changes to a camera
  .
. - Click a window to capture that window.
To exclude the window's shadow from the screenshot, press and hold the Option (⌥) key while you click. - Use the thumbnail to markup, share, save, or take other actions.
Capture a selected portion of the screen
- Click
 in the onscreen controls.
 - Drag to select an area of the screen to capture. To move the entire selection, drag from within the selection.
- Click Capture in the onscreen controls.
- Use the thumbnail to markup, share, save, or take other actions.

Markup, share, and save
- Take no action or swipe the thumbnail to the right and the screenshot is automaticallly saved.
- Click the thumbnail to open the screenshot. You can then edit it using the markup tools in the toolbar, or click
 to share it.
 - Drag the thumbnail to move the screenshot to another location, such as to a document, an email, a Finder window, or the Trash.
- Control-click the thumbnail for more options. For example, you can change the save location, open the screenshot in an app, or delete the screenshot without saving it.

Change the settings
- Save to: Choose where your screenshots are automatically saved, such as Desktop, Documents, or Clipboard.
- Timer: Choose when to take the screenshot: immediately, 5 seconds, or 10 seconds after you click to capture.
- Show Floating Thumbnail: Choose whether to show the thumbnail.
- Remember Last Selection: Choose whether to default to the selections you made the last time you used this tool.
- Show Mouse Pointer: Choose whether to show the mouse pointer in your screenshot.

Or use other screenshot shortcuts
Capture the entire screen
Capture a window
- Press Shift-Command-4.
- Press the Space bar. The pointer changes to a camera
 .
. - Click a window to capture that window.
To exclude the window's shadow from the screenshot, press and hold the Option (⌥) key while you click. - Find the screenshot as a .png file on your desktop.
Capture a selected portion of the screen
- Press Shift-Command-4.
- Drag to select the area of the screen to capture. To move the entire selection, press and hold Space bar while dragging.
- After you release your mouse or trackpad button, find the screenshot as a .png file on your desktop.
Capture a menu
- Click the menu to reveal its contents.
- Press Shift-Command-4.
- Drag to select the area of the menu to capture, then release your mouse or trackpad button to capture that area.
- Or press Space bar to change the pointer to a camera
 , then click the menu to capture it.
- Find the screenshot as a .png file on your desktop.
Capture the Touch Bar
Labels: Mac, screenshot on your Mac


